MENACE throws you into large-scale tactical battles where every decision matters. From squad positioning to morale and suppression, combat rewards smart planning over brute force. In our MENACE tips and tricks guide, you’ll learn how the core combat systems work and how to stay in control as the battlefield starts to spiral.
Table of Contents
Squad Leader Guide
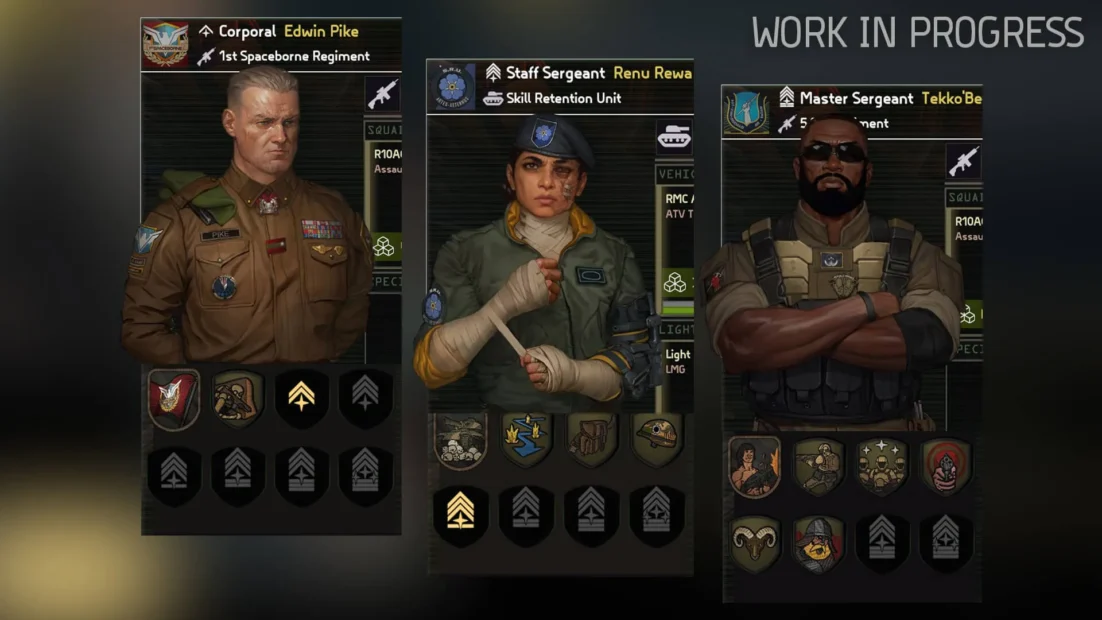
In MENACE, your Squad Leaders determine how your squads behave, how long they survive, and how flexible your tactics can be throughout the campaign. At the heart of every Squad Leader are Attributes, which directly translate into combat-relevant stats. You don’t manually assign these. Instead, they improve naturally through actions in battle, making it crucial to understand what each one does.
- Agility defines how many actions a squad can take per turn. Leaders with high agility feel fast and flexible, letting you reposition, attack, and react more often.
- Weapon Skill determines how accurate your squad is with any weapon. A leader with strong Weapon Skill lands hits more consistently and ends engagements faster.
- Valor influences discipline and how well a squad holds together under pressure. Leaders with strong valor keep their units steady even when situations go south, while low discipline can undermine reliability at the worst moments.
- Toughness controls how much damage your squad takes when hit. Average toughness offers no protection, but higher values significantly reduce incoming damage.
- Vitality affects how much health each element in the squad has. Higher vitality gives you more room for mistakes and greater staying power in extended fights.
- Precision increases the chance to land critical hits, which deal noticeably more damage. Most leaders start with no crit chance, so this stat mainly benefits leaders designed for marksmanship roles.
- Positioning indicates how well a squad avoids enemy fire. Strong positioning reduces enemy accuracy, making your units harder to hit and much more durable in defensive situations.
Beyond raw stats, Squad Leaders are also affected by several long-term systems:
- Promotion Tax increases Supply Cost with every promotion
- Supply Cost limits how many experienced leaders you can field
- Unique Starting Perks define each leader’s identity
- Growth Potential controls how fast attributes improve
- Perk Trees unlock new tactical options through promotions
A common beginner mistake in MENACE is relying on the same four Squad Leaders for every mission. Repeated deployments cause fatigue, which negatively affects several missions. At the same time, promotions raise Supply Cost, making your army less flexible.
This is why hiring additional Squad Leaders is essential. To do that, you need:
- A dossier purchased from the Black Market
- Enough Authority
Authority affects Discipline across your entire roster, so hiring too many leaders at once can weaken all your squads. The upside is flexibility. You can dismiss Squad Leaders at any time to recover their Authority cost, and they will return to the hiring pool. Build a healthy rotation early. Swap leaders before fatigue sets in, keep Supply Cost under control, and let multiple squads grow over time.
MENACE Tips: Customize Your Squad
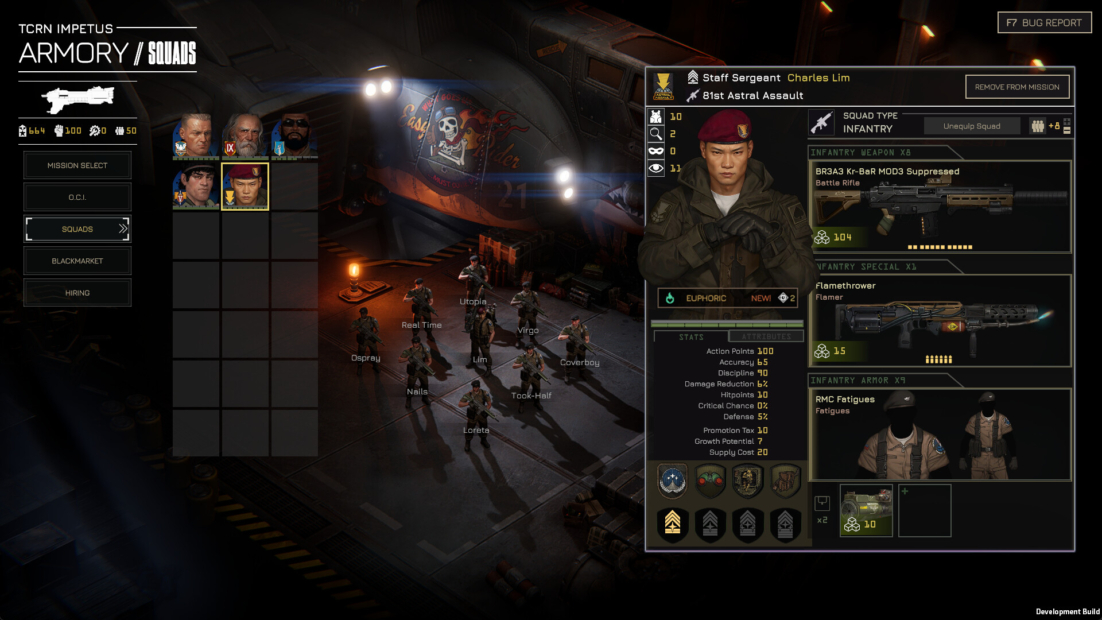
Infantry squads are the most common units you’ll recruit in MENACE, and how you customize them directly determines your long-term success.
When setting up an infantry squad, focus on these core elements:
- Squad size controls how many Squaddies support the Squad Leader. Larger squads deal more damage and have more hit points, but they also cost more supplies to deploy. Squaddies are limited and regenerate slowly, so reckless losses can hurt you across multiple Operations.
- Primary weapons define your squad’s combat role. Always check range, damage, and rate of fire. Some weapons excel at suppression, while others are better suited for close quarters or precision engagements.
- Special weapons such as LMGs, RPGs, or sniper rifles are carried by the Squad Leader and usually have limited uses per mission. They are powerful tools but should be equipped with a clear purpose in mind.
- Armor protects your squad and can unlock additional accessory slots. Different armor types perform better against specific threats, and durability decreases whenever it stops incoming fire.
- Accessories provide tactical options such as grenades, explosives, extra ammo, or recon drones. The right accessory can completely change how a squad handles an objective.
Squaddies are a valuable resource in MENACE. While health is restored between missions, fallen Squaddies may be permanently lost. Replacing them through the Black Market is possible but extremely expensive. We strongly recommend investing in a Med Bay upgrade on the Impetus, which gives you a chance to recover downed Squaddies after missions.
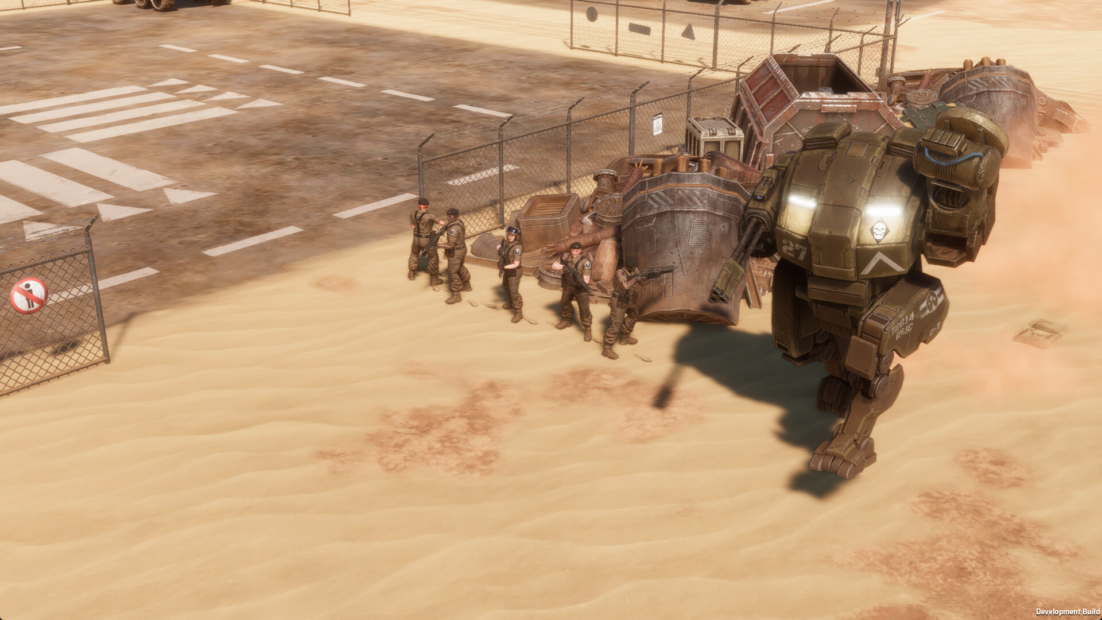
Finally, remember the difference between infantry and vehicle squads. Infantry is flexible, cost-efficient, and ideal for mission control, while vehicles are expensive but powerful and resilient to personnel losses. Choose based on mission goals, not habit.
Operations and Mission Tips
Operations are the primary way to progress in MENACE. Each Operation consists of several missions, and once you commit, you must either complete all missions or abort the Operation, which lowers your Faction Standing.
A core mechanic of MENACE you need to understand early is mission supplies. Every mission has a fixed supply limit, and everything you bring counts toward it.
- Weapons and equipment increase supply usage
- Larger squads multiply supply costs
- Promoted Squad Leaders cost more supplies by default
The important part is this: supplies are tied to the mission, not to your overall resources. There is no downside to using the full supply limit. If you can bring better gear or stronger squads, you should.
When choosing missions within an Operation, take time to review what each offers. Missions are procedurally generated, but all key information is visible before deployment.
Check each mission for:
- Difficulty level and supply limit
- Objectives and special conditions
- Rewards, such as permanent equipment or bonuses that help later missions
Some rewards may not help immediately, but they can make the final mission much easier if chosen wisely.

Once you select a mission in MENACE, Mission Prep is where you gain a real advantage.
Before deploying, always review:
- Time of day and weather, as bad visibility and nighttime drastically reduce the line of sight
- Intel Details, which reveal enemy squad types and positions if your Intel Components are upgraded
- Squad positioning, allowing you to deploy units strategically within highlighted zones
Use positioning to protect fragile squads, counter known enemy types, and secure key areas from the very first turn.
Finally, double-check your Mission Supplies. Hover over squads to see their individual costs. If you are over the limit, adjust loadouts or squad size rather than cutting entire squads whenever possible.
Upgrade Your Ship
At the start of MENACE, the Impetus is in rough shape. Most of its O.C.I. systems are destroyed, limiting both your mission prep and your combat options. Upgrading the ship should be one of your long-term priorities, as these systems affect far more than just firepower.
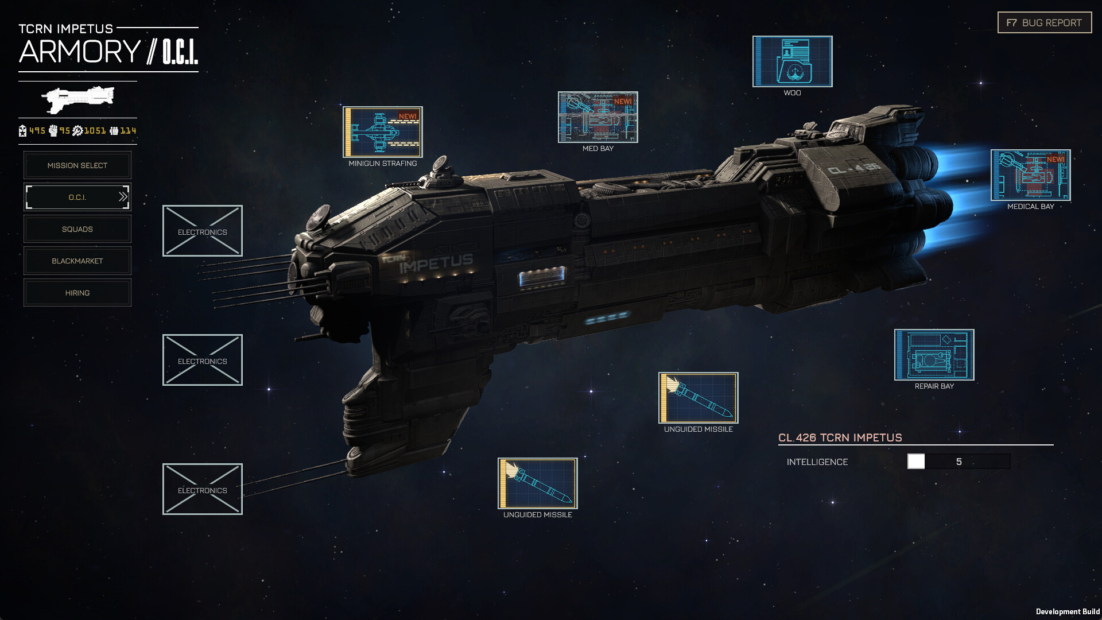
The Impetus has three main upgrade categories, each supporting a different playstyle:
- Electronics enhance your intelligence during mission prep. Higher levels reveal enemy starting positions and squad types, helping you plan deployments rather than react blindly.
- Armament unlocks orbital support such as rockets, strafing runs, and ion beams. These abilities can eliminate high-priority targets or turn a difficult fight in your favor when used at the right moment.
- Hull upgrades focus on sustain and recovery. These include medical bays that heal Squaddies, vehicle repair systems, and upgrades that reinforce squads after a mission. Hull upgrades are especially valuable during longer Operations.
Upgrading O.C.I. systems requires Components, which you earn by completing Operations. Standard TCRN upgrades are usually affordable, while faction-specific upgrades cost more but offer much stronger effects. These are worth investing in once you know what your army needs most.
Beyond ship upgrades, equipment management plays a huge role in your success in MENACE. Weapons, armor, accessories, and vehicles define what your squads can do in combat.
- Missions can reward powerful new gear, especially against human enemies
- The Black Market constantly refreshes its stock
- New equipment is often far better than your starting loadouts
MENACE Combat Guide
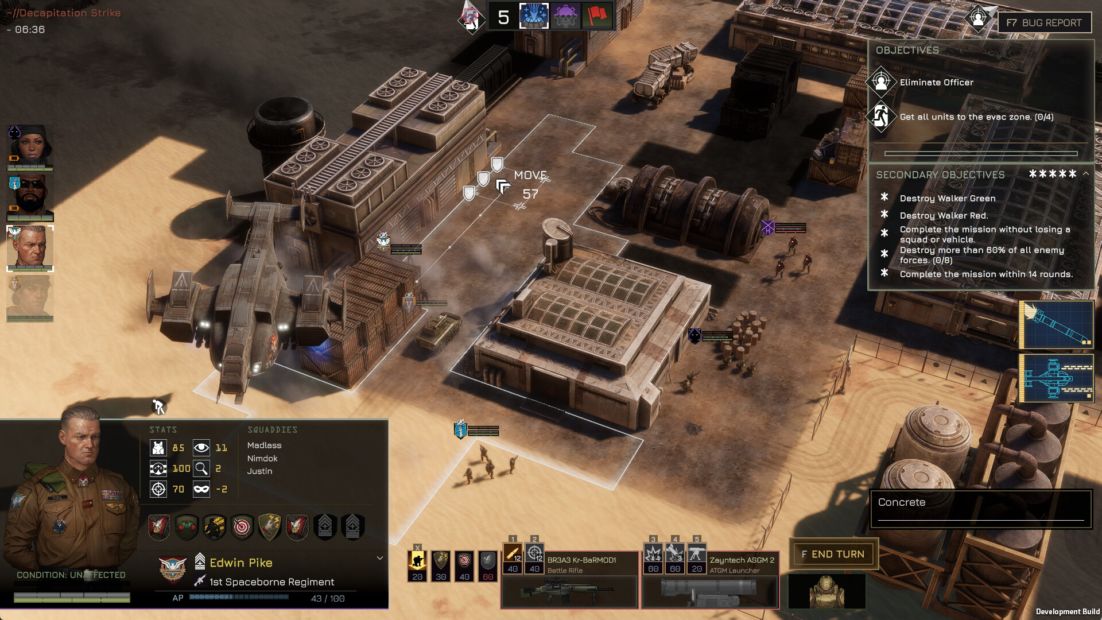
Combat in MENACE uses a turn-based tactical system, but it plays very differently from most games in the genre. Missions are played in rounds. During each round, every faction on the battlefield activates all of its squads once before the next round begins. There is no initiative system, so no squad automatically goes first. You decide the order of your own units, but once a squad ends its turn, it is locked until the next round.
This makes Action Points (AP) extremely important. AP controls everything a squad does during its turn.
- Moving, firing, crouching, and using equipment all cost AP
- Every action clearly shows its AP cost before you commit
- The AP bar on the squad panel shows how much you have left
If you overextend early in a round and reveal enemies, they may get several chances to act before you can respond. Sometimes it’s better to move cautiously and end turns early.
Because you control combat order in MENACE, positioning is crucial. You can move a unit late in one round and then act with it immediately at the start of the next. Just remember that once a squad begins its turn, it must finish before you can switch.
Cover and line of sight are critical in MENACE. Terrain and buildings provide directional cover. A squad may be fully protected on one side and completely exposed on the other. Urban environments are especially dangerous because cover can also block line of sight and hide enemies.
If cover is limited, you can crouch to gain defensive bonuses and unlock special weapon use. While crouched, the squad can’t move until it stands up again, which also costs AP.
Before attacking, always hover over the enemy squad. This preview shows:
- Expected accuracy and penetration
- Suppression potential
- Enemy cover, armor, and current suppression
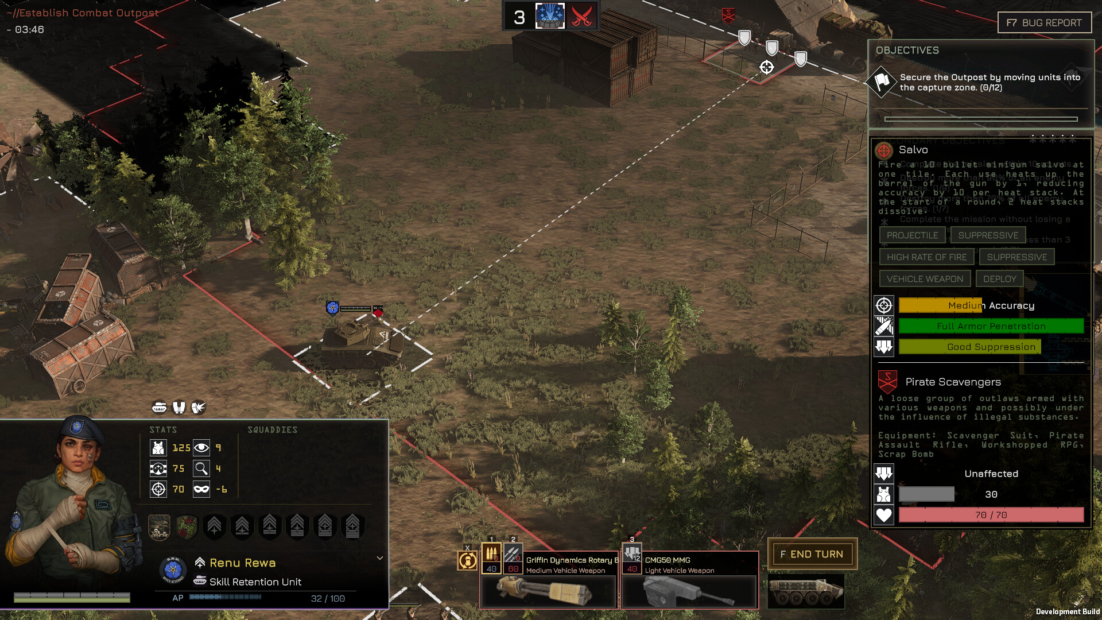
Vehicles in MENACE follow similar rules, with key differences. Many have directional armor, so the angle of attack matters. Heavy weapons with high penetration are far more effective. Vehicles take component damage rather than morale effects, which can disable them even if they are not destroyed.
Combat in MENACE isn’t just about damage. Suppression plays a major role. As squads take fire, their effectiveness drops, lowering accuracy and future AP. High-rate-of-fire weapons and kills apply more suppression, while discipline, armor, and cover reduce it. Suppression even spills onto nearby tiles.
If pressure becomes overwhelming, squads may begin wavering or even flee. These units can’t attack but may recover over time. Tactically, they are no longer threats, allowing you to focus elsewhere.
Finally, remember that casualties matter. Losing Squaddies in MENACE permanently weakens a squad. Protect your units whenever possible, since manpower is limited and mistakes carry over from mission to mission.
Make Combat Your Own with PLITCH!
If you want to experiment with combat systems or smooth out the tougher parts of the game, PLITCH’s MENACE cheats give you full control over how each mission plays out. You can refill or unlock unlimited Action Points for the current squad, remove pressure entirely with No Suppression, or switch on Godmode and Unlimited Armor to focus purely on tactics instead of survival.
PLITCH also lets you reset suppression mid-fight, boost squads with Super Stats, or make infantry encounters easier with Easy Kills. Outside of combat, you can add OCI Components, Promotion Points, Authority, or Faction Trust, giving you freedom to test builds, upgrades, and strategies without long grind sessions.
If you want to learn more about PLITCH, check out this blog and our YouTube channel!
Happy Gaming!
More MENACE Guides: