When it comes to base building, Bethesda’s new game becomes a kind of No Man’s Skyrim. While some mechanics are very reminiscent of Hearthfire, the developer has borrowed a lot from Hello Games’ Foundation Update in other places. In our Starfield Outpost Guide, we’ll show you how to build your outposts.
Table of Contents
1) Unlock base building
The good news is that you can activate construction mode very early in Starfield. All you have to do is complete the first two main missions and join the Constellation on the planet Jemison in the Alpha Centauri system. During the quest “One Small Step,” you’ll meet the robot Vasco. Talk to him to get the necessary information about outposts.
The bad news is that outposts cost a lot of resources to build, and you may not have enough of them at the start of the game. So if you want to build a decent base, you’ll have to farm and grind for a while.
2) Starfield Outpost Guide: Find a suitable location
Theoretically, you can build anywhere in Starfield where there are no settlements. Just scan the planet of your choice and check for resources. After landing, switch to scan mode and select the Outpost tab. After placing the beacon, the Buildings and Machines menu will open.
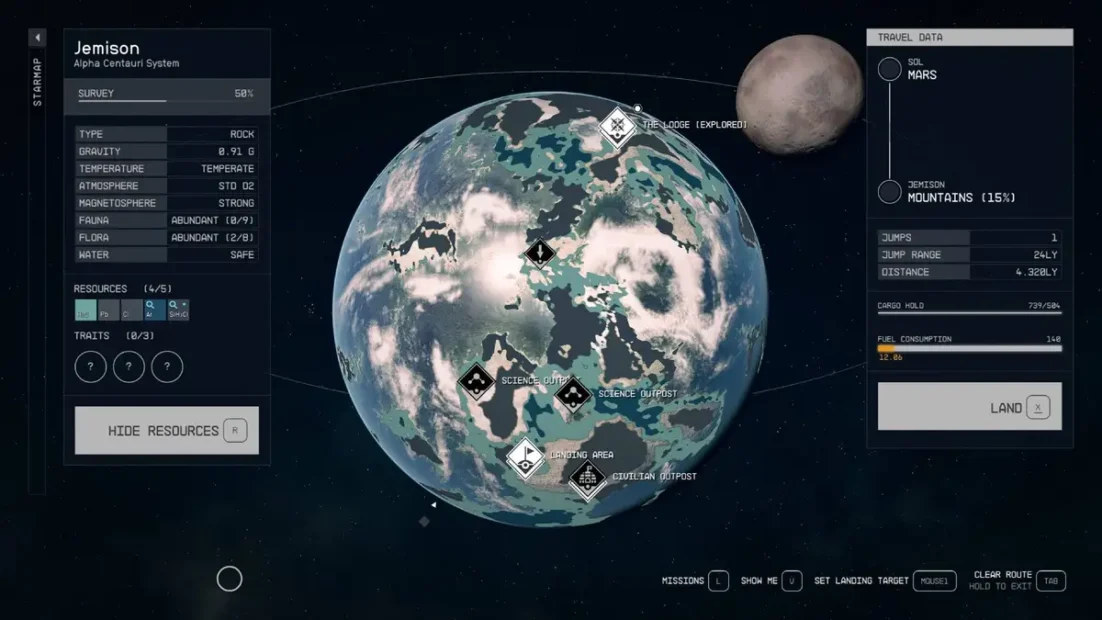
For your first Starfield outposts, we recommend that you focus on places where you can mine aluminum or iron. Both are essential for base building and are needed for almost all structures. However, there is one restriction when choosing a planet: It must not have extreme weather conditions. At least until you have the necessary skills.
Four factors are important: the weather, the atmosphere, the magnetosphere, and the resources. If all parameters are positive and life-friendly, you can start building without hesitation.
3) Finding resources
There are three ways to get resources in Starfield. You can either farm them through your outpost with the help of extractors, or you can mine them with your cutter. The third way is to buy them from a merchant. However, the latter can be very expensive, so it makes sense to focus your exploration and construction efforts on planets that are rich in resources.
Once you’ve scanned a celestial body with your ship, its resource deposits will be displayed in the Properties window. The stars will tell you what kind of resources are available. If no star is visible, it’s a common resource. One star indicates an unusual resource. Two stars indicate a rare resource, and three stars indicate a legendary resource.
If you want to mine as many resources as possible before building your Starfield outpost, you can also look at some hostile planets with unfavorable gravity or atmosphere. Even if they’re not suitable for your planned outpost, they usually have extensive ore deposits that you can mine with your cutter during shore leave.
4) Plan your base
To avoid unnecessary travel between systems, good planning is essential in Starfield. Calculate what and how many resources you need for basic construction. If you have to visit a trader or grind material between each construction phase, the fast travel function can quickly get on your nerves.
The beacon is always free. The solar panel, on the other hand, requires three units of copper, four of aluminum, and two of beryllium. You’ll also need four parts nickel, three parts iron, and five parts aluminum for the water extractor. Before you land from space, you should have at least enough material for these two modules.
Also, think about how you want to expand your Starfield outpost over time and how big you want it to be. After all, you don’t want to encroach on already populated territory. So find a location that gives you enough room to grow. The purpose of your base also plays a role. If your main purpose is to gather resources, you can already see the suitability of a planet on the star map. If, on the other hand, you just want it to be beautiful, take a closer look at the flora and fauna.
5) These skills are helpful
To increase the productivity of your bases, there are a few skills in our Starfield Outpost Guide that will help you. The first is Outpost Management. Level 1 allows you to place additional cargo links, and level 2 increases the number of robots. At the third level, you’ll be able to order more crew members, and when the skill is fully leveled up, your extractors will be twice as efficient.
The Research Methods skill is also interesting. At level 1, research projects and items cost 10% less. At levels 2 and 3, this increases to 20% and 40%, respectively, and at full level, it increases to 60%. In addition, with a level 4 skill, sudden developments happen twice as often.
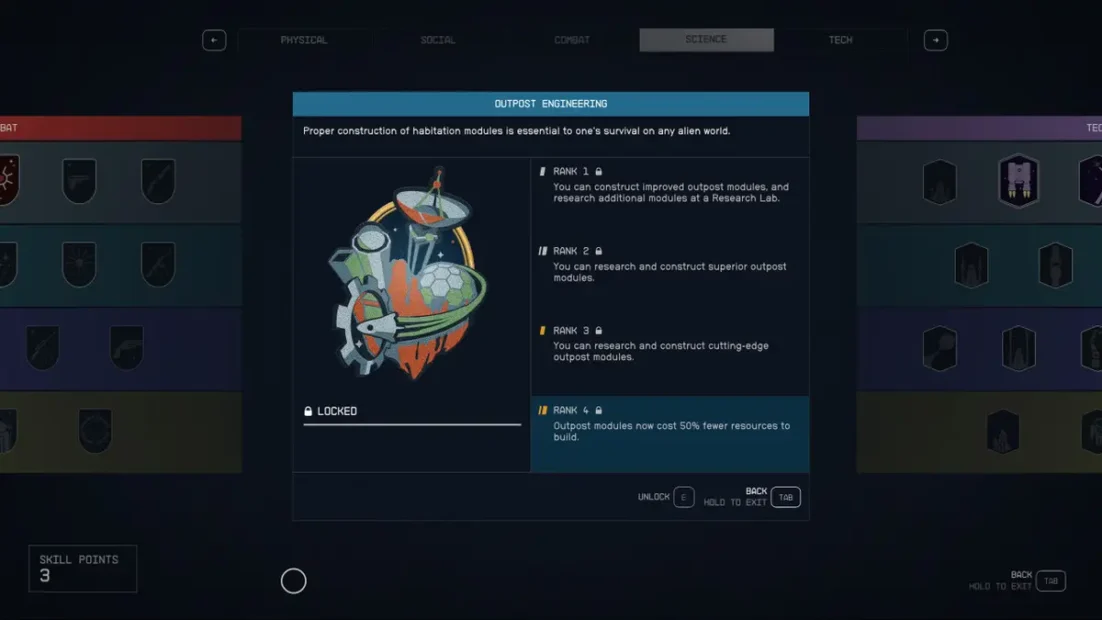
Two other skills to consider are Planetary Colonization and Outpost Technology. The latter improves your outpost modules and allows you to unlock new designs in the research lab. When fully upgraded, it even reduces the number of resources needed to build modules.
Level 1 in Planetary Colonization increases the maximum number of outposts you can build by four. It also allows you to build in places with extreme weather conditions. Level 2 makes high-pressure planets accessible and increases the number of possible bases by eight. Level 3 gives you twelve more outposts and allows you to build on toxic and corrosive planets. At the maximum level you can build 16 additional bases and even extreme gravity is no longer a problem.
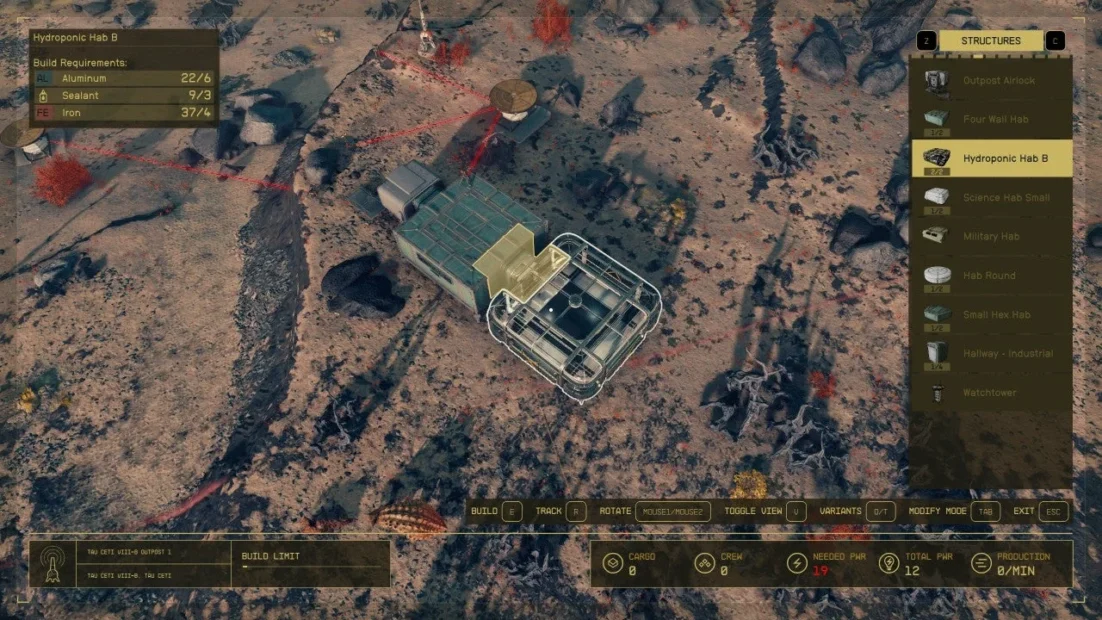
6) What modules are there?
The modules and components of your Starfield base are divided into the following categories
- Extractors (for mining resources)
- Energy (for power supply)
- Warehouses (for storage)
- Buildings (shelters, airlocks, etc.)
- Defense (cannons and weapons)
- Displays (dolls, suitcases, weapon racks)
- Furniture (sofas, beds, etc.)
- Quest (Items for missions)
- Decoration (pictures, rugs, etc.)
- Manufacturing (workbench, lab, etc.)
- Builders (e.g. factory)
- Miscellaneous (landing pad, accessories, etc.)
When you’re in building mode, you can place the individual modules and objects. When you switch to modify mode, you can adjust, move, or remove them. The third setting is the Fly Cam mode. It allows you to see your settlements from above, so you can evaluate the layout of your base.
7) What are the main modules?
The foundation of your base is, of course, the beacon. Once it’s built, you should take care of your energy supply and resource extraction. The basic elements are the water extractor and a solar panel or fuel generator. Once you have both, we recommend that you build an industrial workbench and a small habitat. The workbench will cost you four pieces of aluminum and three pieces of iron. The habitat will cost you another six units of aluminum, four units of lead, and three units of sealant.
To put your small Starfield outpost into production, we recommend that you build a transfer container and a resource extractor that can mine metals. The container will cost you five units of tungsten, eight iron pieces, and four units of grease. The extractor can be made with five units of iron, four units of aluminum, and two units of tungsten.
8) Build a fully automatic system
To save yourself work and create a permanent source of resources, you need an automated system. It is best to put all your resources in the inventory to avoid walking and build the following modules:
- Extractor (for the element you want to mine)
- Tank (for solid or gaseous substances, depending on the element)
- Fuel generator (to power the extractor)

To power the extractor, lay a cable to connect it to the generator. To do this, go to the generator and press E, then select Cable. Next, go to your extractor, press E there as well, and then click on Output Link. This will allow you to specify that the extracted resources go to the corresponding warehouse. If it’s a metal, use a solid container, and if it’s a gas, use a gas storage.

For the fuel generator to work, it needs an appropriate supply. On a planet with a Helium-3 deposit, it’s best to build a corresponding extractor and a gas storage tank and connect the latter to the generator. This will make it a self-sustaining system. Alternatively, your extractors can be powered by solar panels. Of course, this requires sufficient sunlight.
9) Assigning Crew Members
Let’s say your Starfield outpost is built, the power supply is up and running and the extractors are working. Now you need to keep everything running and fill your settlement with life. To do this, build a crew station for three nickel, two iron, and five aluminum, then go to your ship’s menu and click on Crew. Alternatively, you can just press C.
By clicking Assign, you can assign each recruited member of your crew to either a spaceship or an outpost, even from space. To get bonuses, it’s best to assign your people according to their skills.
10) Defending outposts
On some planets in Starfield, you won’t be alone. Pirates and wild animals can be a threat that you should be prepared for. We recommend that you set up self-firing systems in vulnerable areas that will automatically target enemies. For starters, we recommend a laser or ballistic turret.
Build your best outpost with PLITCH!
Our Starfield Outpost Guide should make it easy for you to build bases. To make sure you don’t run out of resources and to let your creativity run wild, PLITCH’s Starfield cheats will also help you. For example, you can increase the amount of credits you have to buy from merchants, or you can disable the cost of building altogether.
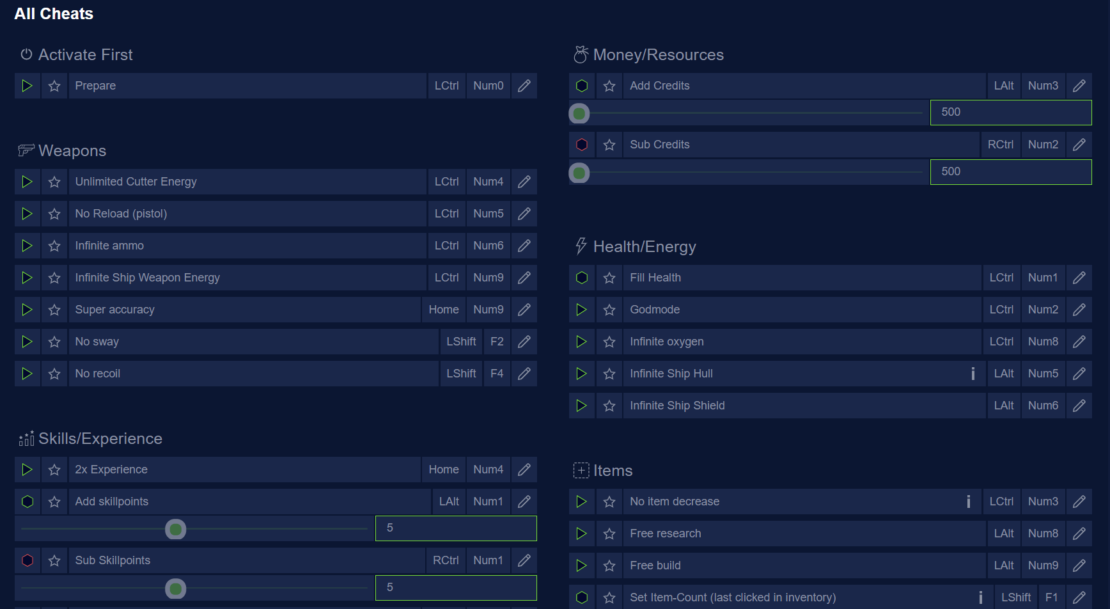
With infinite cutter energy, there’s no limit to the amount of farming you can do on your travels, and an improved run speed allows you to maneuver between resource hotspots more quickly.
To learn more about PLITCH and our Starfield mods, check out this blog and our Let’s Play on YouTube!
Happy Gaming!